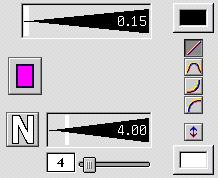
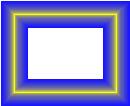
| This Neon button allows you to simulate the look of neon. This effect can be applied to almost all objects in Create. As you will notice in the graphic on the right, the top line width control sets the topmost line width of the object. The color button below that controls the fill color of a graphic object. The second line width control sets the width of the bottommost and thickest line that makes up the neon effect, and the bottom text entry box and slider controls the number of gradations used in the neon effect. Take note of these settings (they are also in the above graphic); then select your name rose object. Load the Outline inspector, then activate Neon. Enter the settings form the original object into the neon controls. Your name rose object should now look like the Neon_Rose_Create. You can experiment with the various neon controls. The Neon effect can be applied to all Create objects except the Box Graphic and Paragraph Text, so pick a tool from the Tool palette, draw an object, activate the Outline effect, and play with the various neon controls. Change the number of neon gradations, the total line width and the start line width. Modify the start and end colors using the Start and End color controls on the right side of the inspector. Click on the different Blend method controls and also swap the start and end colors by clicking on the Flip Colors button. | ||||||
 | ||||||
 | ||||||